
Container Clustering with ECS Lab
For more information on ECS visit aws.amazon.com
Description:
This lab is meant to serve as a docker/containers clustering lab course. The objective of this lab will be to walk through a step by step exercise to help a user new to ECS to deploy a containerized app on the ECS platform.
Pre-Requisites:
As an alternative to installing the pre-requisites below, you could build an ec2-linux instance with all of the requirements bundled in. See the bottom of this page in the Resources section for a packer file that will create a lab builder AMI.
1. AWS Account:
You will need to have an active AWS account, as this lab will cover setting up an ECS cluster using the AWS ECS service.
2. IAM User:
You will need an IAM user created with a the appropriate permissions (admin access for this demo). The user should have programmatic access, and have a generated Access Key, and associated Access Secret Key. You will also need the users ARN for later in the lab (Found in the IAM console under the users section).
3. Python and PIP:
You will need to have python and PIP (Pip Installs Packages) installed on your workstation so we can download and install the AWS CLI tools. This step will be required for various provisioning/deployment steps further down the tutorial.
- Python
- yum/apt-get install -y python-pip
4. Install AWS CLI:
In order to interact with AWS easier, you should have the awscli tool installed and configured with proper user access and user access secrets. You can configure the access key and access secret key using the aws configure command once the CLI tools have been installed via python pip
pip3 install awscli
aws configure
AWS Access Key ID [None]:
AWS Secret Access Key [None]:
Default region name [None]:
Default output format [None]:
Example:
Desktop rnason$ aws configure
AWS Access Key ID [None]: ABCDEFGHIJKLMNOPQRST
AWS Secret Access Key [None]: ****************************************
Default region name [us-east-2]:
Default output format [None]:
5. Putty (Windows Only):
If your using windows, then you will need to have Putty and Putty KeyGen installed on your local windows instance. We will need putty in order to SSH to the docker instances, and Putty KeyGen in order to convert the AWS Key PEM file to a putty required PPK File.
- Download the AWS Key Pem file used to launch your instance to your local drive
- Download Putty
- Download PuttyGen
Convert the PEM file into Putty PPK files
Open PuttyGen, Click on the Load button. Browse to the PEM file, and click on Open. Press OK on the import dialog box.

Save the Private Key
| Once Loaded, Click on the **Save Private Key** button to save the private key as a ppk formatted file. Press Yes on the dialog asking if you want to save the file without a passphrase to protect it. |  |

Save the Public Key
Last Click on the Save Public Key button to save the public key.

Keys now ready to use with Putty!
Once save, the private key can be used with putty to connect to your EC2 instances.
Provisioning an ECS Cluster:
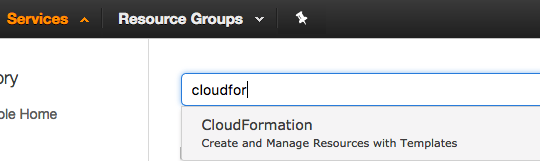
1. Open CloudFormation console:
We will use CloudFormation in order to launch a fully flushed ECS cluster environment complete with auto-scaling, load balancing, and a pre-deployed test app. It also creates a security group that opens up ports 22/80/8080 and a range from 31000-61000 for dynamic port allocation for application deployments. We can do this by logging into the AWS console, and from the list of services choose CloudFormation.
2. Copy CF Template:
We will use the following CloudFormation template in order to launch off the ECS cluster. Copy the CloudFormation template below and save it locally on your drive as ecs_cluster.json. If you are using a remote host to run this lab, then copy the template to your clipboard, and on the build host, again paste the template into a file using vim /media/ecs_cluster.json, i, paste, and save the file by typing esc, :wq!.
{
"AWSTemplateFormatVersion":"2010-09-09",
"Parameters":{
"KeyName":{
"Type":"AWS::EC2::KeyPair::KeyName",
"Description":"Name of an existing EC2 KeyPair to enable SSH access to the ECS instances."
},
"VpcId":{
"Type":"AWS::EC2::VPC::Id",
"Description":"Select a VPC that allows instances to access the Internet."
},
"SubnetId":{
"Type":"List<AWS::EC2::Subnet::Id>",
"Description":"Select at two subnets in your selected VPC."
},
"DesiredCapacity":{
"Type":"Number",
"Default":"1",
"Description":"Number of instances to launch in your ECS cluster."
},
"MaxSize":{
"Type":"Number",
"Default":"1",
"Description":"Maximum number of instances that can be launched in your ECS cluster."
},
"InstanceType":{
"Description":"EC2 instance type",
"Type":"String",
"Default":"t2.micro",
"AllowedValues":[
"t2.micro",
"t2.small",
"t2.medium",
"t2.large",
"m3.medium",
"m3.large",
"m3.xlarge",
"m3.2xlarge",
"m4.large",
"m4.xlarge",
"m4.2xlarge",
"m4.4xlarge",
"m4.10xlarge",
"c4.large",
"c4.xlarge",
"c4.2xlarge",
"c4.4xlarge",
"c4.8xlarge",
"c3.large",
"c3.xlarge",
"c3.2xlarge",
"c3.4xlarge",
"c3.8xlarge",
"r3.large",
"r3.xlarge",
"r3.2xlarge",
"r3.4xlarge",
"r3.8xlarge",
"i2.xlarge",
"i2.2xlarge",
"i2.4xlarge",
"i2.8xlarge"
],
"ConstraintDescription":"Please choose a valid instance type."
}
},
"Mappings":{
"AWSRegionToAMI":{
"us-east-1":{
"AMIID":"ami-eca289fb"
},
"us-east-2":{
"AMIID":"ami-446f3521"
},
"us-west-1":{
"AMIID":"ami-9fadf8ff"
},
"us-west-2":{
"AMIID":"ami-7abc111a"
},
"eu-west-1":{
"AMIID":"ami-a1491ad2"
},
"eu-central-1":{
"AMIID":"ami-54f5303b"
},
"ap-northeast-1":{
"AMIID":"ami-9cd57ffd"
},
"ap-southeast-1":{
"AMIID":"ami-a900a3ca"
},
"ap-southeast-2":{
"AMIID":"ami-5781be34"
}
}
},
"Resources":{
"ECSCluster":{
"Type":"AWS::ECS::Cluster"
},
"EcsSecurityGroup":{
"Type":"AWS::EC2::SecurityGroup",
"Properties":{
"GroupDescription":"ECS Security Group",
"VpcId":{
"Ref":"VpcId"
}
}
},
"EcsSecurityGroupHTTPinbound":{
"Type":"AWS::EC2::SecurityGroupIngress",
"Properties":{
"GroupId":{
"Ref":"EcsSecurityGroup"
},
"IpProtocol":"tcp",
"FromPort":"80",
"ToPort":"80",
"CidrIp":"0.0.0.0/0"
}
},
"EcsSecurityGroupJENKINSinbound":{
"Type":"AWS::EC2::SecurityGroupIngress",
"Properties":{
"GroupId":{
"Ref":"EcsSecurityGroup"
},
"IpProtocol":"tcp",
"FromPort":"8080",
"ToPort":"8080",
"CidrIp":"0.0.0.0/0"
}
},
"EcsSecurityGroupSSHinbound":{
"Type":"AWS::EC2::SecurityGroupIngress",
"Properties":{
"GroupId":{
"Ref":"EcsSecurityGroup"
},
"IpProtocol":"tcp",
"FromPort":"22",
"ToPort":"22",
"CidrIp":"0.0.0.0/0"
}
},
"EcsSecurityGroupALBports":{
"Type":"AWS::EC2::SecurityGroupIngress",
"Properties":{
"GroupId":{
"Ref":"EcsSecurityGroup"
},
"IpProtocol":"tcp",
"FromPort":"31000",
"ToPort":"61000",
"SourceSecurityGroupId":{
"Ref":"EcsSecurityGroup"
}
}
},
"CloudwatchLogsGroup":{
"Type":"AWS::Logs::LogGroup",
"Properties":{
"LogGroupName":{
"Fn::Join":[
"-",
[
"ECSLogGroup",
{
"Ref":"AWS::StackName"
}
]
]
},
"RetentionInDays":14
}
},
"taskdefinition":{
"Type":"AWS::ECS::TaskDefinition",
"Properties":{
"Family":{
"Fn::Join":[
"",
[
{
"Ref":"AWS::StackName"
},
"-ecs-demo-app"
]
]
},
"ContainerDefinitions":[
{
"Name":"simple-app",
"Cpu":"10",
"Essential":"true",
"Image":"httpd:2.4",
"Memory":"300",
"LogConfiguration":{
"LogDriver":"awslogs",
"Options":{
"awslogs-group":{
"Ref":"CloudwatchLogsGroup"
},
"awslogs-region":{
"Ref":"AWS::Region"
},
"awslogs-stream-prefix":"ecs-demo-app"
}
},
"MountPoints":[
{
"ContainerPath":"/usr/local/apache2/htdocs",
"SourceVolume":"my-vol"
}
],
"PortMappings":[
{
"ContainerPort":80
}
]
},
{
"Name":"busybox",
"Cpu":10,
"Command":[
"/bin/sh -c \"while true; do echo '<html> <head> <title>Amazon ECS Sample App</title> <style>body {margin-top: 40px; background-color: #333;} </style> </head><body> <div style=color:white;text-align:center> <h1>Amazon ECS Sample App</h1> <h2>Congratulations!</h2> <p>Your application is now running on a container in Amazon ECS.</p>' > top; /bin/date > date ; echo '</div></body></html>' > bottom; cat top date bottom > /usr/local/apache2/htdocs/index.html ; sleep 1; done\""
],
"EntryPoint":[
"sh",
"-c"
],
"Essential":false,
"Image":"busybox",
"Memory":200,
"LogConfiguration":{
"LogDriver":"awslogs",
"Options":{
"awslogs-group":{
"Ref":"CloudwatchLogsGroup"
},
"awslogs-region":{
"Ref":"AWS::Region"
},
"awslogs-stream-prefix":"ecs-demo-app"
}
},
"VolumesFrom":[
{
"SourceContainer":"simple-app"
}
]
}
],
"Volumes":[
{
"Name":"my-vol"
}
]
}
},
"ECSALB":{
"Type":"AWS::ElasticLoadBalancingV2::LoadBalancer",
"Properties":{
"Name":{ "Fn::Join" : [ "", [ "ECSALB-", { "Ref" : "AWS::StackName" }]]},
"Scheme":"internet-facing",
"LoadBalancerAttributes":[
{
"Key":"idle_timeout.timeout_seconds",
"Value":"30"
}
],
"Subnets":{
"Ref":"SubnetId"
},
"SecurityGroups":[
{
"Ref":"EcsSecurityGroup"
}
]
}
},
"ALBListener":{
"Type":"AWS::ElasticLoadBalancingV2::Listener",
"DependsOn":"ECSServiceRole",
"Properties":{
"DefaultActions":[
{
"Type":"forward",
"TargetGroupArn":{
"Ref":"ECSTG"
}
}
],
"LoadBalancerArn":{
"Ref":"ECSALB"
},
"Port":"80",
"Protocol":"HTTP"
}
},
"ECSALBListenerRule":{
"Type":"AWS::ElasticLoadBalancingV2::ListenerRule",
"DependsOn":"ALBListener",
"Properties":{
"Actions":[
{
"Type":"forward",
"TargetGroupArn":{
"Ref":"ECSTG"
}
}
],
"Conditions":[
{
"Field":"path-pattern",
"Values":[
"/"
]
}
],
"ListenerArn":{
"Ref":"ALBListener"
},
"Priority":1
}
},
"ECSTG":{
"Type":"AWS::ElasticLoadBalancingV2::TargetGroup",
"DependsOn":"ECSALB",
"Properties":{
"HealthCheckIntervalSeconds":10,
"HealthCheckPath":"/",
"HealthCheckProtocol":"HTTP",
"HealthCheckTimeoutSeconds":5,
"HealthyThresholdCount":2,
"Name":{ "Fn::Join" : [ "", [ "ECSTG-", { "Ref" : "AWS::StackName" }]]},
"Port":80,
"Protocol":"HTTP",
"UnhealthyThresholdCount":2,
"VpcId":{
"Ref":"VpcId"
}
}
},
"ECSAutoScalingGroup":{
"Type":"AWS::AutoScaling::AutoScalingGroup",
"Properties":{
"VPCZoneIdentifier":{
"Ref":"SubnetId"
},
"LaunchConfigurationName":{
"Ref":"ContainerInstances"
},
"MinSize":"1",
"MaxSize":{
"Ref":"MaxSize"
},
"DesiredCapacity":{
"Ref":"DesiredCapacity"
}
},
"CreationPolicy":{
"ResourceSignal":{
"Timeout":"PT15M"
}
},
"UpdatePolicy":{
"AutoScalingReplacingUpdate":{
"WillReplace":"true"
}
}
},
"ContainerInstances":{
"Type":"AWS::AutoScaling::LaunchConfiguration",
"Properties":{
"ImageId":{
"Fn::FindInMap":[
"AWSRegionToAMI",
{
"Ref":"AWS::Region"
},
"AMIID"
]
},
"SecurityGroups":[
{
"Ref":"EcsSecurityGroup"
}
],
"InstanceType":{
"Ref":"InstanceType"
},
"IamInstanceProfile":{
"Ref":"EC2InstanceProfile"
},
"KeyName":{
"Ref":"KeyName"
},
"UserData":{
"Fn::Base64":{
"Fn::Join":[
"",
[
"#!/bin/bash -xe\n",
"echo ECS_CLUSTER=",
{
"Ref":"ECSCluster"
},
" >> /etc/ecs/ecs.config\n",
"yum install -y aws-cfn-bootstrap\n",
"/opt/aws/bin/cfn-signal -e $? ",
" --stack ",
{
"Ref":"AWS::StackName"
},
" --resource ECSAutoScalingGroup ",
" --region ",
{
"Ref":"AWS::Region"
},
"\n"
]
]
}
}
}
},
"service":{
"Type":"AWS::ECS::Service",
"DependsOn":"ALBListener",
"Properties":{
"Cluster":{
"Ref":"ECSCluster"
},
"DesiredCount":"1",
"LoadBalancers":[
{
"ContainerName":"simple-app",
"ContainerPort":"80",
"TargetGroupArn":{
"Ref":"ECSTG"
}
}
],
"Role":{
"Ref":"ECSServiceRole"
},
"TaskDefinition":{
"Ref":"taskdefinition"
}
}
},
"ECSServiceRole":{
"Type":"AWS::IAM::Role",
"Properties":{
"AssumeRolePolicyDocument":{
"Statement":[
{
"Effect":"Allow",
"Principal":{
"Service":[
"ecs.amazonaws.com"
]
},
"Action":[
"sts:AssumeRole"
]
}
]
},
"Path":"/",
"Policies":[
{
"PolicyName":"ecs-service",
"PolicyDocument":{
"Statement":[
{
"Effect":"Allow",
"Action":[
"elasticloadbalancing:DeregisterInstancesFromLoadBalancer",
"elasticloadbalancing:DeregisterTargets",
"elasticloadbalancing:Describe*",
"elasticloadbalancing:RegisterInstancesWithLoadBalancer",
"elasticloadbalancing:RegisterTargets",
"ec2:Describe*",
"ec2:AuthorizeSecurityGroupIngress"
],
"Resource":"*"
}
]
}
}
]
}
},
"ServiceScalingTarget":{
"Type":"AWS::ApplicationAutoScaling::ScalableTarget",
"DependsOn":"service",
"Properties":{
"MaxCapacity":2,
"MinCapacity":1,
"ResourceId":{
"Fn::Join":[
"",
[
"service/",
{
"Ref":"ECSCluster"
},
"/",
{
"Fn::GetAtt":[
"service",
"Name"
]
}
]
]
},
"RoleARN":{
"Fn::GetAtt":[
"AutoscalingRole",
"Arn"
]
},
"ScalableDimension":"ecs:service:DesiredCount",
"ServiceNamespace":"ecs"
}
},
"ServiceScalingPolicy":{
"Type":"AWS::ApplicationAutoScaling::ScalingPolicy",
"Properties":{
"PolicyName":"AStepPolicy",
"PolicyType":"StepScaling",
"ScalingTargetId":{
"Ref":"ServiceScalingTarget"
},
"StepScalingPolicyConfiguration":{
"AdjustmentType":"PercentChangeInCapacity",
"Cooldown":60,
"MetricAggregationType":"Average",
"StepAdjustments":[
{
"MetricIntervalLowerBound":0,
"ScalingAdjustment":200
}
]
}
}
},
"ALB500sAlarmScaleUp":{
"Type":"AWS::CloudWatch::Alarm",
"Properties":{
"EvaluationPeriods":"1",
"Statistic":"Average",
"Threshold":"10",
"AlarmDescription":"Alarm if our ALB generates too many HTTP 500s.",
"Period":"60",
"AlarmActions":[
{
"Ref":"ServiceScalingPolicy"
}
],
"Namespace":"AWS/ApplicationELB",
"Dimensions":[
{
"Name":"ECSService",
"Value":{
"Ref":"service"
}
}
],
"ComparisonOperator":"GreaterThanThreshold",
"MetricName":"HTTPCode_ELB_5XX_Count"
}
},
"EC2Role":{
"Type":"AWS::IAM::Role",
"Properties":{
"AssumeRolePolicyDocument":{
"Statement":[
{
"Effect":"Allow",
"Principal":{
"Service":[
"ec2.amazonaws.com"
]
},
"Action":[
"sts:AssumeRole"
]
}
]
},
"Path":"/",
"Policies":[
{
"PolicyName":"ecs-service",
"PolicyDocument":{
"Statement":[
{
"Effect":"Allow",
"Action":[
"ecs:CreateCluster",
"ecs:DeregisterContainerInstance",
"ecs:DiscoverPollEndpoint",
"ecs:Poll",
"ecs:RegisterContainerInstance",
"ecs:StartTelemetrySession",
"ecs:Submit*",
"logs:CreateLogStream",
"logs:PutLogEvents"
],
"Resource":"*"
}
]
}
}
]
}
},
"AutoscalingRole":{
"Type":"AWS::IAM::Role",
"Properties":{
"AssumeRolePolicyDocument":{
"Statement":[
{
"Effect":"Allow",
"Principal":{
"Service":[
"application-autoscaling.amazonaws.com"
]
},
"Action":[
"sts:AssumeRole"
]
}
]
},
"Path":"/",
"Policies":[
{
"PolicyName":"service-autoscaling",
"PolicyDocument":{
"Statement":[
{
"Effect":"Allow",
"Action":[
"application-autoscaling:*",
"cloudwatch:DescribeAlarms",
"cloudwatch:PutMetricAlarm",
"ecs:DescribeServices",
"ecs:UpdateService"
],
"Resource":"*"
}
]
}
}
]
}
},
"EC2InstanceProfile":{
"Type":"AWS::IAM::InstanceProfile",
"Properties":{
"Path":"/",
"Roles":[
{
"Ref":"EC2Role"
}
]
}
}
},
"Outputs":{
"ecsservice":{
"Value":{
"Ref":"service"
}
},
"ecscluster":{
"Value":{
"Ref":"ECSCluster"
}
},
"ECSALB":{
"Description":"Your ALB DNS URL",
"Value":{
"Fn::Join":[
"",
[
{
"Fn::GetAtt":[
"ECSALB",
"DNSName"
]
}
]
]
}
},
"taskdef":{
"Value":{
"Ref":"taskdefinition"
}
}
}
}
3. Validate the Template (Optional):
Once the cloud formation template has been saved to a file on your local drive or remote instance, the template can be validated using the awscli.
aws cloudformation validate-template --template-body file://ecs_cluster.json
4. Launch the ECS Stack:
The CloudFormation template above can be launched in 2 ways, via the CLI or the GUI. Both steps have been included below, but only 1 of the methods needs to be performed. DO NOT LAUNCH USING BOTH METHODS to avoid duplicate stacks and/or launch errors.
CLI
aws cloudformation create-stack --stack-name {{STACK_NAME}} \
--template-body file://{{FILE_NAME}}.json \
--capabilities CAPABILITY_IAM \
--parameters \
ParameterKey=KeyName,ParameterValue={{KEYNAME}} \
ParameterKey=VpcId,ParameterValue={{VPCID}} \
ParameterKey=SubnetId,ParameterValue=\"{{SUBNETID_1_ID}},{{SUBNETID_2_ID}}\" \
ParameterKey=DesiredCapacity,ParameterValue={{DESIREDCAPACITY}} \
ParameterKey=MaxSize,ParameterValue={{MAX_SIZE}} \
ParameterKey=InstanceType,ParameterValue={{INSTANCE_TYPE}}
- DesiredCapacity - Number of ECS cluster nodes that you would like to launch
- InstanceType - Instance family type, and size that you want to use for your ECS cluster nodes.
- KeyName - The SSH Key pair that you want assigned to the ECS Cluster nodes.
- MaxSize - The maximum number of ECS cluster nodes that the autoscaling group will be able to launch.
NOTE: This should be greater than or equal to the DesiredCapacity Parameter - SubnetId - The subnet(s) that the cluster nodes will be launched in.
- VpcId - The VPC that the cluster nodes will be launched in.
Example: (Replace KeyName, VpcId, SubnetId, and InstanceType Parameters With Your Values)
aws cloudformation create-stack --stack-name ecs-demo-cluster \
--template-body file://ecs_cluster.json \
--capabilities CAPABILITY_IAM \
--parameters \
ParameterKey=KeyName,ParameterValue=My_AWS_Key \
ParameterKey=VpcId,ParameterValue=vpc-a12345bc \
ParameterKey=SubnetId,ParameterValue=\"subnet-12a3456b,subnet-23b4567c\" \
ParameterKey=DesiredCapacity,ParameterValue=3 \
ParameterKey=MaxSize,ParameterValue=5 \
ParameterKey=InstanceType,ParameterValue=t2.small
Response:
{
    "StackId": "arn:aws:cloudformation:us-east-2:012345678910:stack/ecs-demo-cluster/123a4567-8b9c-10d1-d112-13efa1bc4d1e"
}
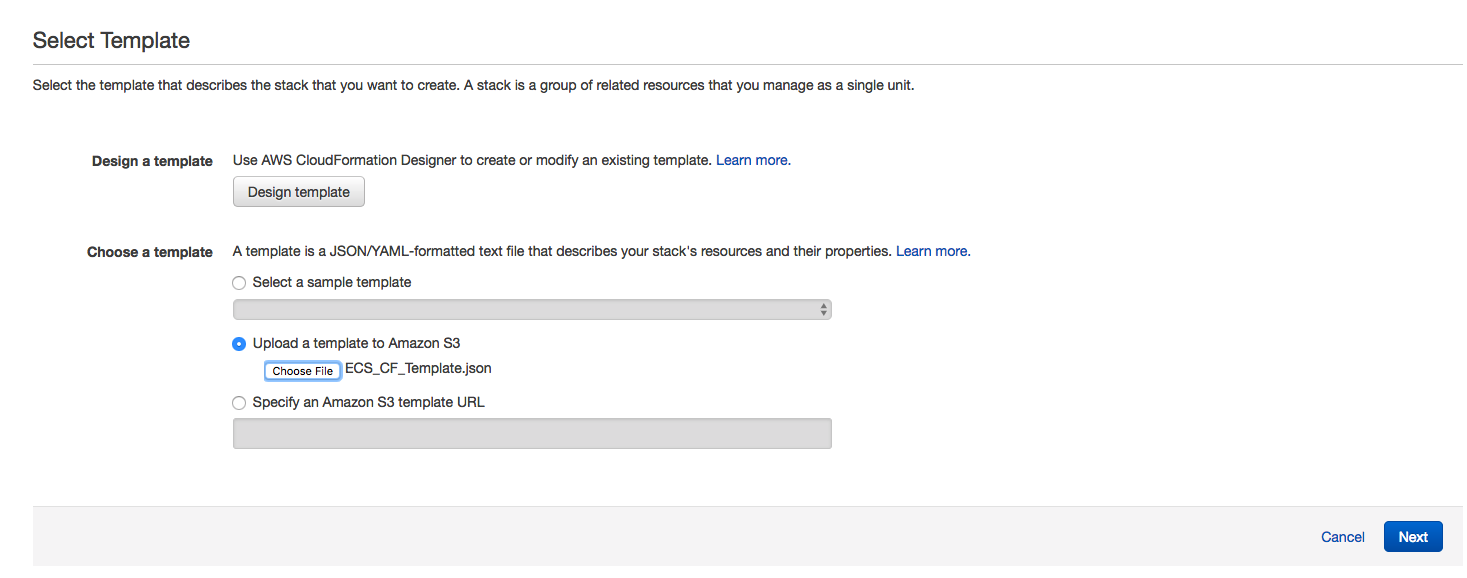
GUI
From the cloud formation screen, click the  button to get started. Once on the Select Template screen, click the second option Upload a template to Amazon S3 and click the Choose File button. In the selector box window, choose the CloudFormation template that you saved to your drive from the earlier step and then click the
  button.
1. Define Stack Parameters:
In the Details window, Type a name for the stack, and then choose the appropriate values for the stack parameters and then click the button.
- DesiredCapacity - Number of ECS cluster nodes that you would like to launch
- InstanceType - Instance family type, and size that you want to use for your ECS cluster nodes.
- KeyName - The SSH Key pair that you want assigned to the ECS Cluster nodes.
- MaxSize - The maximum number of ECS cluster nodes that the autoscaling group will be able to launch.
NOTE: This should be greater than or equal to the DesiredCapacity Parameter - SubnetId - The subnet(s) that the cluster nodes will be launched in.
- VpcId - The VPC that the cluster nodes will be launched in.

2. Define Stack Options:
In the Options window, set up any key/value pairs, IAM roles or notifications that you want associated with the cluster, and then click the button.

3. Review and Launch:
In the Review window, review your selected options, and once satisfied, click the I acknowledge that AWS CloudFormation might create IAM resources. check box, and click the  button to launch the stack.

Verify Stack
1. Monitor the launch:
Once the create button has been pushed, CloudFormation will begin to create the stack and all stack dependencies. You can watch the progress of the launch in the CloudFormation service console window.

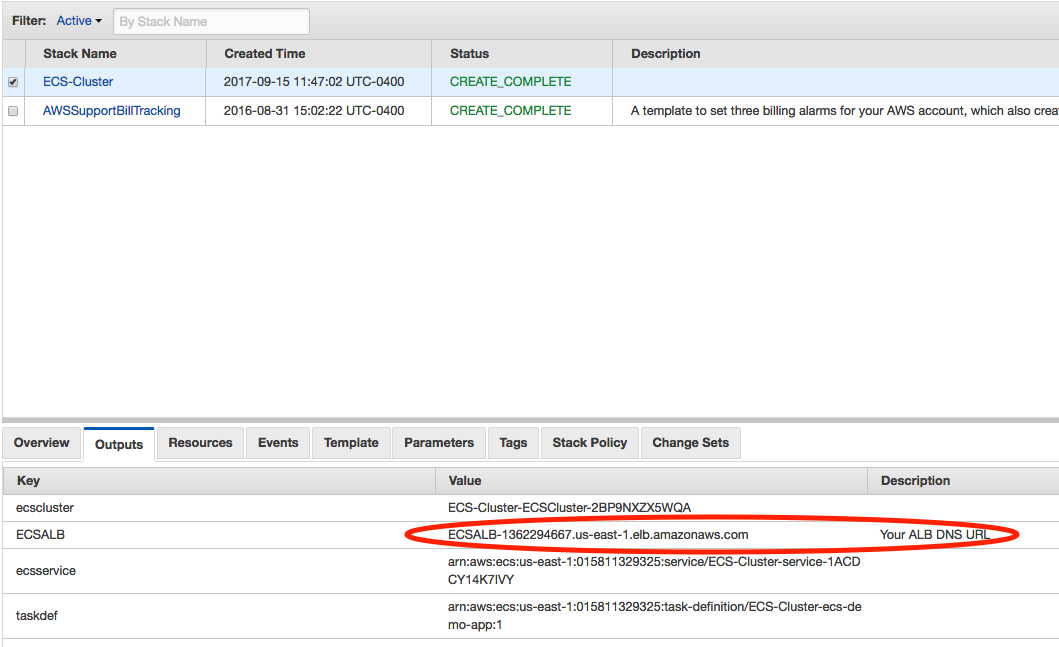
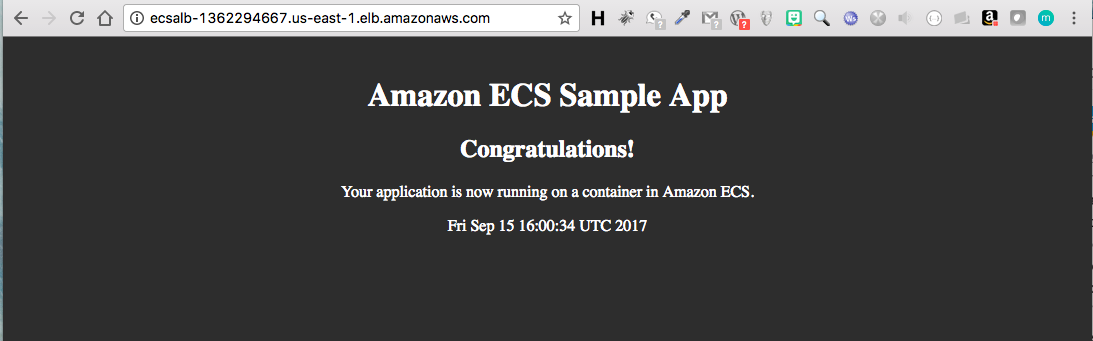
2 . Verify the stack:
Once the stack has been successfully launched by showing the Create_COMPLETE status, test the deployment, by clicking on the Output tab and copying the ECSALB value from the outputs window into a browser. The AWS test app should load correctly in your browser.
The following 2 sections define a way to deploy a container/task/service via both through the CLI, and the ECS Console. Only 1 of the following methods needs to be performed. If you deploy via the Deployment to ECS (CLI), then you don't need to perform the steps listed in the Deployment to ECS (GUI/Console) section, and similarly, if you wish to deploy via the GUI/Console then you can skip the Deployment to ECS (CLI) section of the lab.
Deploying to ECS (CLI):
IAM Role:
We need to define a role that will be used by ECS service. Perform the following steps to define a new ECS security policy, and attach it to the ECS Service Role that was crated by CloudFormation.
1. Define the new policy:
aws iam create-role --role-name {{ROLE_NAME}} --assume-role-policy-document '{"Version":"2008-10-17","Statement":[{"Principal":{"Service":"ecs.amazonaws.com"},"Sid":"","Action":"sts:AssumeRole","Effect":"Allow"}]}'
Example:
aws iam create-role --role-name EcsLabServiceRole --assume-role-policy-document '{"Version":"2008-10-17","Statement":[{"Principal":{"Service":"ecs.amazonaws.com"},"Sid":"","Action":"sts:AssumeRole","Effect":"Allow"}]}'
Response:
{
    "Role": {
        "AssumeRolePolicyDocument": {
            "Version": "2008-10-17",
            "Statement": [
                {
                    "Action": "sts:AssumeRole",
                    "Sid": "",
                    "Effect": "Allow",
                    "Principal": {
                        "Service": "ecs.amazonaws.com"
                    }
                }
            ]
        },
        "RoleId": "AROAISYIMYC2ER7JJOB4G",
        "CreateDate": "2017-09-23T01:31:27.211Z",
        "RoleName": "EcsLabServiceRole",
        "Path": "/",
        "Arn": "arn:aws:iam::012345678910:role/EcsLabServiceRole"
    }
}
2. Attach the policy to the ECS Service Role:
aws iam attach-role-policy --role-name {{ROLE_NAME}} --policy-arn "arn:aws:iam::aws:policy/service-role/AmazonEC2ContainerServiceRole"
Example:
aws iam attach-role-policy --role-name EcsLabServiceRole --policy-arn "arn:aws:iam::aws:policy/service-role/AmazonEC2ContainerServiceRole"
Log Group:
Now we need to set up a Log group that we can attach to containers. This allows us to assign logging directives to containers/tasks that we will launch in future steps.
1. Create the Log Group:
aws logs create-log-group --log-group-name {{LOG_GROUP_NAME}}
Example:
aws logs create-log-group --log-group-name ecs-lab
Task Definitions:
We need to create a service in ECS but before that can be done, the container needs be a part of a Task Definition. Task Definitions define things like environment variables, the container image you wish to use, and the resources you want to allocate to the service (port, memory, CPU).
1. Creating the Task Definition:
To create a Task Definition, save a JSON-formatted template using aws ecs register-task-definition --generate-cli-skeleton > task-definition.json and complete, using the values below, or copy the template below and save it locally on your drive as task-definition.json. If you are using a remote host to run this lab, then copy the template to your clipboard, and on the build host, again paste the template into a file using vim /media/task-definition.json, i, paste, and save the file by typing esc, :wq!.
{
  "family": "{{TASK_IDENTIFIER}}",
  "networkMode": "bridge",
  "containerDefinitions": [
    {
      "name": "{{TASK_NAME}}",
      "image": "{{REPO/IMAGE:TAG}}",
      "cpu": {{CPUS}},
      "memory": {{RAM_AMT}},
      "portMappings": [
        {
          "protocol": "{{PROTOCOL}}",
          "hostPort": {{HOST_PORT}},
          "containerPort": {{CONTAINER_PORT}}
        }
      ],
      "essential": true,
      "command": ["CMD1", "CMD2"],
      "environment": [],
      "mountPoints": [],
      "volumesFrom": [],
      "hostname": "{{HOSTNAME}}",
      "logConfiguration": {
        "logDriver": "awslogs",
        "options": {
          "awslogs-stream-prefix": "{{LOG_PREFIX}}",
          "awslogs-group": "{{LOG_GROUP}}",
          "awslogs-region": "{{REGION}}"
        }
      }
    }
  ],
  "volumes": [],
  "placementConstraints": []
}
Example: (Save as task-definition.json)
{
  "family": "ecs-task-nginx",
  "networkMode": "bridge",
  "containerDefinitions": [
    {
      "name": "ecs-task-nginx",
      "image": "nginx:latest",
      "cpu": 0,
      "memory": 256,
      "portMappings": [
        {
          "protocol": "tcp",
          "hostPort": 0,
          "containerPort": 80
        }
      ],
      "essential": true,
      "command": [],
      "environment": [],
      "mountPoints": [],
      "volumesFrom": [],
      "hostname": "nginx",
      "logConfiguration": {
        "logDriver": "awslogs",
        "options": {
          "awslogs-stream-prefix": "nginx",
          "awslogs-group": "ecs-lab",
          "awslogs-region": "us-east-1"
        }
      }
    }
  ],
  "volumes": [],
  "placementConstraints": []
}
* We've specified a specific container image, including the
:latest tag. Although it's not important for this lab, in a production environment where you were creating Task Definitions programmatically from a CI/CD pipeline, Task Definitions could include a specific SHA hash, or a more accurate tag. * In this example, you will also notice that the image we are using is simply
nginx:latest, which appears to be missing the URL part of the image naming convention. If an image only shows the repository:tag designation, it simply implies that the image will be pulled from the docker hub, and is an official image which doesn't require the prefix name space. When the docker daemon sees a repository:tag designation it auto implies to pull the library/nginx:latest image directly from the [Docker Hub](https://hub.docker.com). - Under containerDefinitions.portMappings, we've specified a containerPort (80), but left hostPort as 0. This is required to facilitate dynamic port allocation. This means that we don't need to map the Container Port to a specific Host Port in our Container Definition; instead, we can let the ALB allocate a port during task placement. To learn more about port allocation, check out the ECS documentation at http://docs.aws.amazon.com/AmazonECS/latest/APIReference/API_PortMapping.html.
2. Register the Task Definition:
Register your task definition using your modified template.
aws ecs register-task-definition --cli-input-json file://task-definition.json
Response:
{
    "taskDefinition": {
        "status": "ACTIVE",
        "networkMode": "bridge",
        "family": "ecs-task-nginx",
        "placementConstraints": [],
        "requiresAttributes": [
            {
                "name": "com.amazonaws.ecs.capability.docker-remote-api.1.17"
            },
            {
                "name": "com.amazonaws.ecs.capability.logging-driver.awslogs"
            },
            {
                "name": "com.amazonaws.ecs.capability.docker-remote-api.1.19"
            }
        ],
        "volumes": [],
        "taskDefinitionArn": "arn:aws:ecs:us-east-1:012345678910:task-definition/ecs-task-nginx:1",
        "containerDefinitions": [
            {
                "environment": [],
                "name": "ecs-task-nginx",
                "mountPoints": [],
                "image": "nginx:latest",
                "hostname": "nginx",
                "cpu": 0,
                "portMappings": [
                    {
                        "protocol": "tcp",
                        "containerPort": 80,
                        "hostPort": 0
                    }
                ],
                "command": [],
                "memory": 256,
                "logConfiguration": {
                    "logDriver": "awslogs",
                    "options": {
                        "awslogs-region": "us-east-1",
                        "awslogs-stream-prefix": "nginx",
                        "awslogs-group": "ecs-lab"
                    }
                },
                "essential": true,
                "volumesFrom": []
            }
        ],
        "revision": 1
    }
}
Load Balancer:
Before we deploy our service, we will need to construct a load balancer listener for our new application deployment, as well as Target Group. A Target group will tell the load balancer how to handle incoming requests and where to send those requests on the backend. Things to account for will be existing listeners on a particular load balancer and the ports that they are using. Be mindful of ports already in use when setting up a new listener.
Use the same VpcId that was created in earlier steps or by the launched CloudFormation Template when creating the new Target Group. Use the following command to get the VpcId.
1. Get VPC_ID:
In order to define a Target Group, we will need to designate the VPC ID where the target group will be deployed.
aws cloudformation describe-stacks --stack-name "{{STACK_NAME}}" | jq '.Stacks[0].Parameters[] | select(.ParameterKey == "VpcId") | .ParameterValue'
Example:
aws cloudformation describe-stacks --stack-name "ecs-demo-cluster" | jq '.Stacks[0].Parameters[] | select(.ParameterKey == "VpcId") | .ParameterValue'
Response:
vpc-a12345bc
2. Create Target Group:
Next, we need to create a Application Load Balancer (ALB) target group for the nginx service that we plan to deploy. Perform the following steps in order to provision a new Target Group (TG).
aws elbv2 create-target-group \
--name "{{ALB_NAME}}" \
--protocol {{PROTOCOL}} \
--port {{PORT}} \
--vpc-id {{ VpcId }} \
--health-check-path "{{PATH}}"
Example: (REPLACE the VPC_ID, Protocol, Port and HC-Paths with YOUR Values)
aws elbv2 create-target-group \
--name "EcsLabAlbNginx" \
--protocol HTTP \
--port 8080 \
--vpc-id "vpc-a12345bc" \
--health-check-path "/"
Response: (Save the response TargetGroupArn value, you will need it in step 3)
{
    "TargetGroups": [
        {
            "HealthCheckPath": "/",
            "HealthCheckIntervalSeconds": 30,
            "VpcId": "vpc-a12345bc",
            "Protocol": "HTTP",
            "HealthCheckTimeoutSeconds": 5,
            "HealthCheckProtocol": "HTTP",
            "UnhealthyThresholdCount": 2,
            "HealthyThresholdCount": 5,
            "TargetGroupArn": "arn:aws:elasticloadbalancing:us-east-1:012345678910:targetgroup/EcsLabAlbNginx/1ace00c83d25a820",
            "Matcher": {
                "HttpCode": "200"
            },
            "HealthCheckPort": "traffic-port",
            "Port": 8080,
            "TargetGroupName": "EcsLabAlbNginx"
        }
    ]
}
In order to provision a new listener, we will need to use the same LoadBalencerArn and TargetGroupArn that were created in earlier steps or by the launched CloudFormation Template. Use the following commands to get the LoadBalencerArn and TargetGroupArn values, and save them for the next step.
3. Get LoadBalancerArn:
First lets grab the Load Balancer ARN, we can do this with a describe-load-balancers command. Note that we are using aws elbv2 which designates an ALB, aws elb would designate a classic load balancer.
aws elbv2 describe-load-balancers | jq '.LoadBalancers[0].LoadBalancerArn'
Response:
"arn:aws:elasticloadbalancing:us-east-1:012345678910:loadbalancer/app/ECSALB/cec500d531b4ae58"
4. Get TargetGroupArn:
Next we need the ARN of the Target Group we just created, we can get this with a describe-target-groups command. Note that we are using aws elbv2 which designates an ALB, aws elb would designate a classic load balancer. Notice also that the describe-target-groups command takes the --names flag. If you don't know the name of the Target Group you are looking for, you can issue the aws elbv2 describe-target-groups without the --names flag. This will return back a list of all target groups instead of just the specific one that we are looking for.
aws elbv2 describe-target-groups --names EcsLabAlbNginx | jq '.TargetGroups[0].TargetGroupArn'
Response:
"arn:aws:elasticloadbalancing:us-east-1:012345678910:targetgroup/EcsLabAlbNginx/1ace00c83d25a820"
5. Create LB Listener:
Now that we have defined our Target Group, and retrieved the ARNs of both the LB and TG, we need to provision a new listener on the ALB. The new listener will listen on port 8080, and map traffic coming in from that port to the Target Group that we defined.
aws elbv2 create-listener \
--load-balancer-arn {{LISTENER_ARN}} \
--protocol {{PROTOCOL}} \
--port {{PORT}} \
--default-actions Type=forward,TargetGroupArn={{TARGETGROUP_ARN}}
Example: (REPLACE the LoadBalencerARN and TargetGroupArn with YOUR ALB & TargetGroup ARNS)
aws elbv2 create-listener \
--load-balancer-arn arn:aws:elasticloadbalancing:us-east-1:012345678910:loadbalancer/app/ECSALB/cec500d531b4ae58 \
--protocol HTTP \
--port 8080 \
--default-actions Type=forward,TargetGroupArn=arn:aws:elasticloadbalancing:us-east-1:012345678910:targetgroup/EcsLabAlbNginx/1ace00c83d25a820
Response:
{
    "Listeners": [
        {
            "Protocol": "HTTP",
            "DefaultActions": [
                {
                    "TargetGroupArn": "arn:aws:elasticloadbalancing:us-east-1:012345678910:targetgroup/EcsLabAlbNginx/1ace00c83d25a820",
                    "Type": "forward"
                }
            ],
            "LoadBalancerArn": "arn:aws:elasticloadbalancing:us-east-1:012345678910:loadbalancer/app/ECSALB/cec500d531b4ae58",
            "Port": 8080,
            "ListenerArn": "arn:aws:elasticloadbalancing:us-east-1:012345678910:listener/app/ECSALB/cec500d531b4ae58/de82a2f15cabcfd8"
        }
    ]
}
Services:
Now We're going to create a service based on the Task Definition we created earlier. A service is simply just a group of tasks (containers) which put together comprise a single service also know as a micro service. You can define how many tasks you want to run simultaneously, specify load balancing, auto scaling and configure many other options.
Choose the cluster name and targetGroupArn you created earlier when creating the CloudFormation stack. Use the commands below to get the cluster name and TargetGroupArn. For the purposes of this lab, we'll only start one copy of each task. In a production environment, you will always want more than one copy of each task running for reliability and availability.
1. Get Cluster Name:
First lets grab the Cluster Name, we can do this with a list-clusters command.
aws ecs list-clusters | grep ecs-demo-cluster
Response:
"arn:aws:ecs:us-east-1:012345678910:cluster/ecs-demo-cluster-ECSCluster-6PWLYLE2XPZ9"
2. Get TargetGroupArn:
Next we need the ARN of the Target Group we just created, we can get this with a describe-target-groups command. Note that we are using aws elbv2 which designates an ALB, aws elb would designate a classic load balancer. Notice also that the describe-target-groups command takes the --names flag. If you don't know the name of the Target Group you are looking for, you can issue the aws elbv2 describe-target-groups without the --names flag. This will return back a list of all target groups instead of just the specific one that we are looking for.
aws elbv2 describe-target-groups --names EcsLabAlbNginx | jq '.TargetGroups[0].TargetGroupArn'
Response:
"arn:aws:elasticloadbalancing:us-east-1:012345678910:targetgroup/EcsLabAlbNginx/1ace00c83d25a820"
3. Create the Service Template:
To create a Service, save a JSON-formatted template using aws ecs create-service --generate-cli-skeleton > service.json and complete, using the values below, or copy the template below and save it locally on your drive as service.json. If you are using a remote host to run this lab, then copy the template to your clipboard, and on the build host, again paste the template into a file using vim /media/service.json, i, paste, and save the file by typing esc, :wq!.
{
  "taskDefinition": "{{TASK_DEF_NAME}}",
  "cluster": "{{ECS_CLUSTER_NAME}}",
  "serviceName": "{{SERVICE_NAME}}",
  "role": "{{ROLE_NAME}}",
  "desiredCount": {{NUM_DESIRED}},
  "deploymentConfiguration": {
    "minimumHealthyPercent": {{1-100}},
    "maximumPercent": {{1-200}}
  },
  "placementStrategy": [
    {
      "type": "spread",
      "field": "attribute:ecs.availability-zone"
    },
    {
      "type": "spread",
      "field": "instanceId"
    }
  ],
  "loadBalancers": [
    {
      "targetGroupArn": "{{TARGET_GROUP_ARN}}",
      "containerName": "{{CONTAINER_NAME}}",
      "containerPort": {{CONTAINER_PORT}}
    }
  ]
}
Example: (REPLACE the cluster name and targetGroupArn with YOUR cluster name and TargetGroup ARN and Save file as service.json)
{
  "taskDefinition": "ecs-task-nginx:1",
  "cluster": "ecs-demo-cluster-ECSCluster-6PWLYLE2XPZ9",
  "serviceName": "EcsServiceNginx",
  "role": "EcsLabServiceRole",
  "desiredCount": 3,
  "deploymentConfiguration": {
    "minimumHealthyPercent": 50,
    "maximumPercent": 200
  },
  "placementStrategy": [
    {
      "type": "spread",
      "field": "attribute:ecs.availability-zone"
    },
    {
      "type": "spread",
      "field": "instanceId"
    }
  ],
  "loadBalancers": [
    {
      "targetGroupArn": "arn:aws:elasticloadbalancing:us-east-1:012345678910:targetgroup/EcsLabAlbNginx/1ace00c83d25a820",
      "containerName": "ecs-task-nginx",
      "containerPort": 80
    }
  ]
}
You can keep the default for the Task Placement Policy. To learn more about the different Task Placement Policies, see the [documentation](http://docs.aws.amazon.com/AmazonECS/latest/developerguide/task-placement-strategies.html), or this [blog post](https://aws.amazon.com/blogs/compute/introducing-amazon-ecs-task-placement-policies/).
4. Launch the Service:
Create the service using your modified template.
aws ecs create-service --cli-input-json file://service.json
Response:
{
    "service": {
        "status": "ACTIVE",
        "taskDefinition": "arn:aws:ecs:us-east-1:012345678910:task-definition/ecs-task-nginx:1",
        "pendingCount": 0,
        "loadBalancers": [
            {
                "containerName": "ecs-task-nginx",
                "targetGroupArn": "arn:aws:elasticloadbalancing:us-east-1:012345678910:targetgroup/EcsLabAlbNginx/1ace00c83d25a820",
                "containerPort": 80
            }
        ],
        "roleArn": "arn:aws:iam::012345678910:role/EcsLabServiceRole",
        "placementConstraints": [],
        "createdAt": 1506206526.98,
        "desiredCount": 3,
        "serviceName": "EcsServiceNginx",
        "clusterArn": "arn:aws:ecs:us-east-1:012345678910:cluster/ecs-demo-cluster-ECSCluster-6PWLYLE2XPZ9",
        "serviceArn": "arn:aws:ecs:us-east-1:012345678910:service/EcsServiceNginx",
        "deploymentConfiguration": {
            "maximumPercent": 200,
            "minimumHealthyPercent": 50
        },
        "deployments": [
            {
                "status": "PRIMARY",
                "pendingCount": 0,
                "createdAt": 1506206526.98,
                "desiredCount": 3,
                "taskDefinition": "arn:aws:ecs:us-east-1:012345678910:task-definition/ecs-task-nginx:1",
                "updatedAt": 1506206526.98,
                "id": "ecs-svc/9223370530648248827",
                "runningCount": 0
            }
        ],
        "events": [],
        "runningCount": 0,
        "placementStrategy": [
            {
                "field": "attribute:ecs.availability-zone",
                "type": "spread"
            },
            {
                "field": "instanceId",
                "type": "spread"
            }
        ]
    }
}
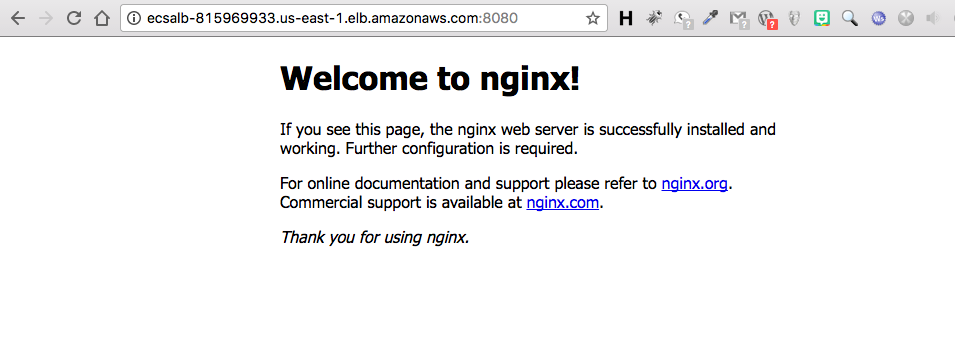
5. Verify the Service Launch:
Last we need to verify that our service launched. We can do this by getting the LB DNS address and pasting it into a browser window. The expected result should be seeing the nginx start page.
aws elbv2 describe-load-balancers | jq '.LoadBalancers[0].DNSName'
Response:
"ECSALB-815969933.us-east-1.elb.amazonaws.com"
Deploying to ECS (GUI/Console):
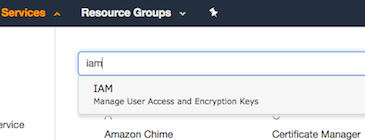
IAM Role:
We need to define a role that will be used by ECS service. Perform the following steps to define a new ECS security policy, and attach it to the ECS Service Role that was crated by CloudFormation. Roles are created in the IAM console. Navigate to the IAM console, by clicking the main Services menu and choosing IAM.
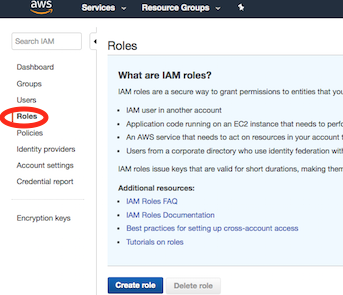
1. Create Role:
Once on the IAM console, click on the Roles link in the left side IAM menu. Once on the Roles console page click the  button to create a new role.
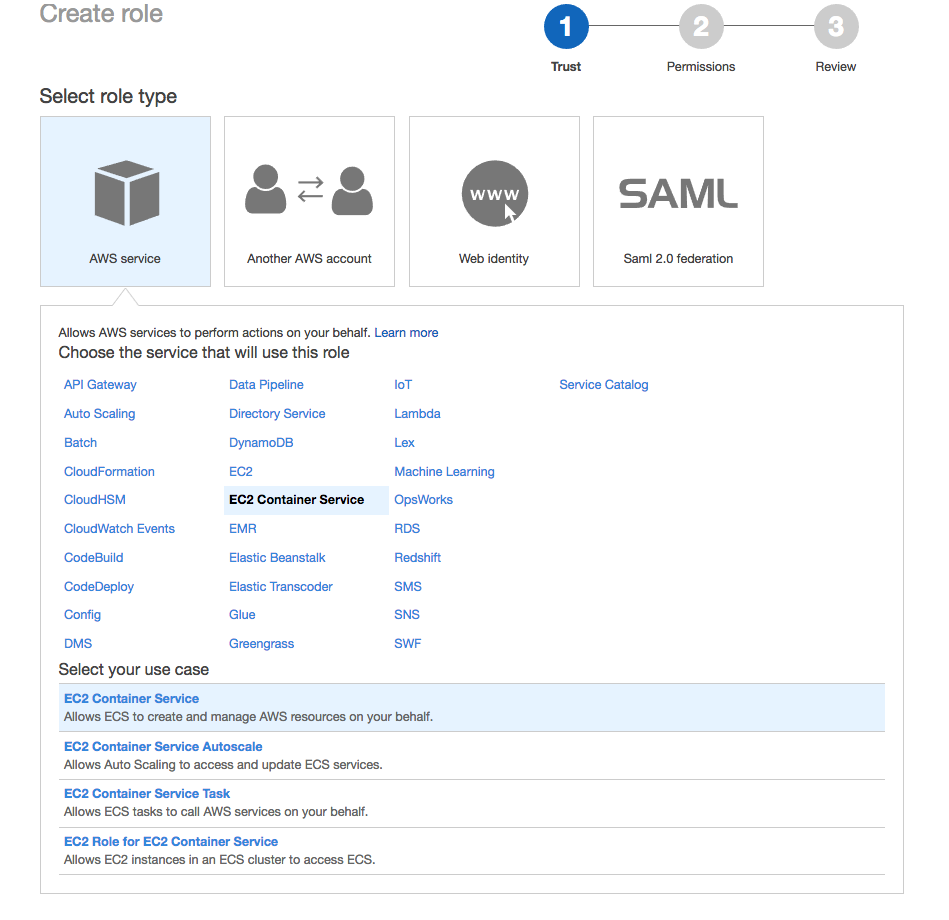
2. Create Role:
In the Create Role console view, Choose AWS Service from the selection, then in the list of services, choose EC2 Container Service, and finally choose EC2 Container Service from the Select your use case Section under the service list. Last Click the  button to proceed.
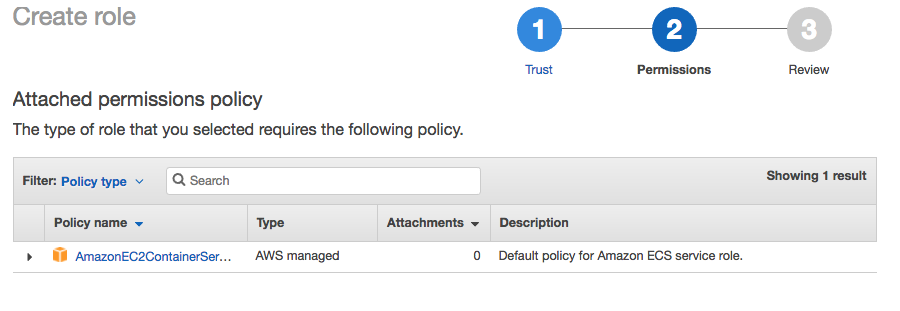
Next in the Attached permissions policy verify that AmazonEC2ContainerServiceRole is set under the policy section, and then hit the  button to proceed.
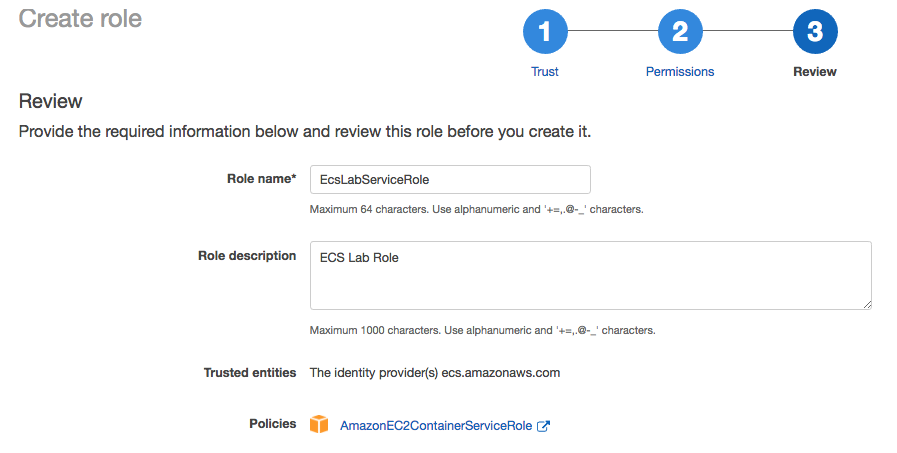
In the Review Section, Type EcsLabServiceRole in the Role name field, type a short description in Role description field and then hit the button to create the role.
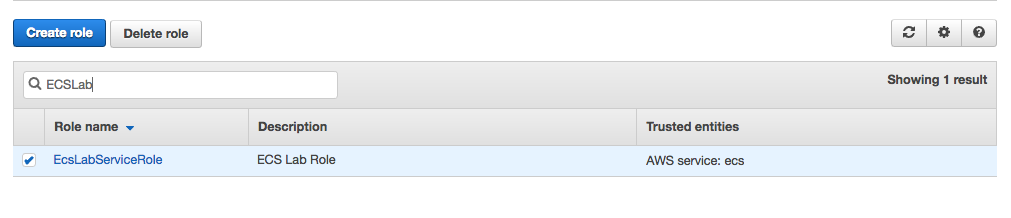
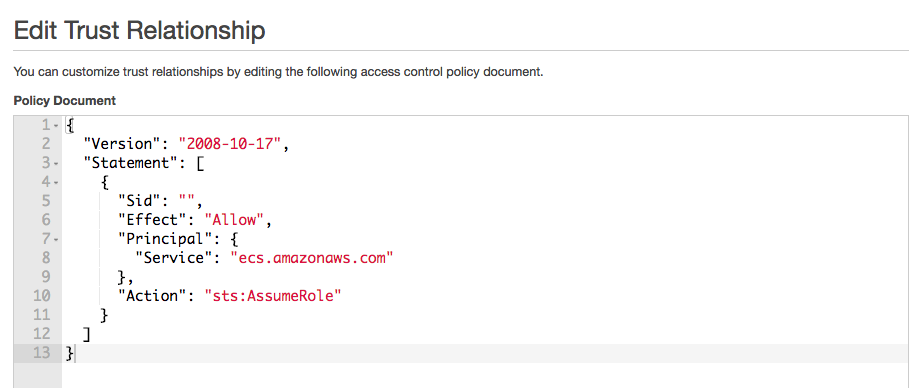
3. Verify the Role Policy:
Back on the main Roles page, search for the EcsLabServiceRole Role from the list. Once located, click on it to review the role details.
Next, in the Role details page, click on the Trust Relationships tab, and click on the  button to view the trust policy.
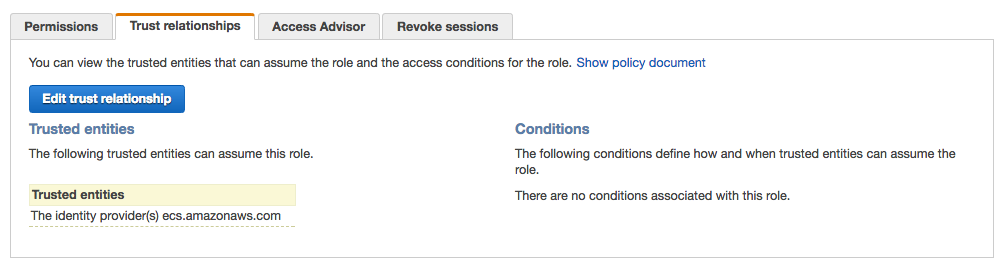
Last Review the Trust policy, and once verified, click on the Cancel button link to return to the roles view.
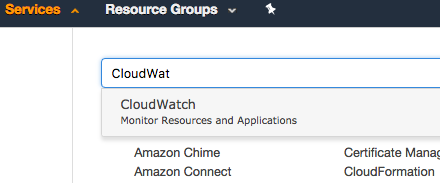
Log Group:
Now we need to set up a Log group that we can attach to containers. This allows us to assign logging directives to containers/tasks that we will launch in future steps. To create a log group, go to the main Services menu and select CloudWatch.
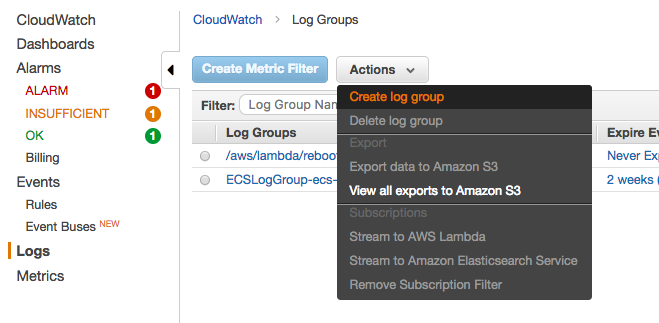
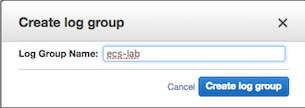
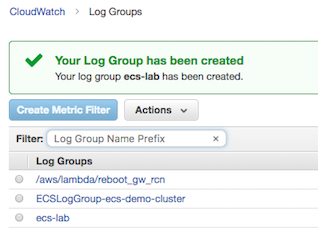
1. Create the Log Group:
Once in the CloudWatch console page, from the left hand menu, click on Logs. Once the logs panel shows, click on Actions and choose Create log group from the Actions Menu. In the log group dialog box, type the group name ecs-lab, and click the  button.
Task Definitions:
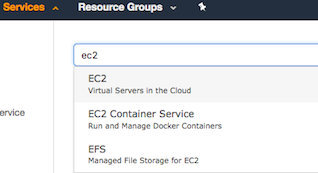
We need to create a service in ECS but before that can be done, the container needs be a part of a Task Definition. Task Definitions define things like environment variables, the container image you wish to use, and the resources you want to allocate to the service (port, memory, CPU). To create a task we must first navigate to the ECS Console. From the main Services menu, select EC2 Container Service to go to the EC2 console page.

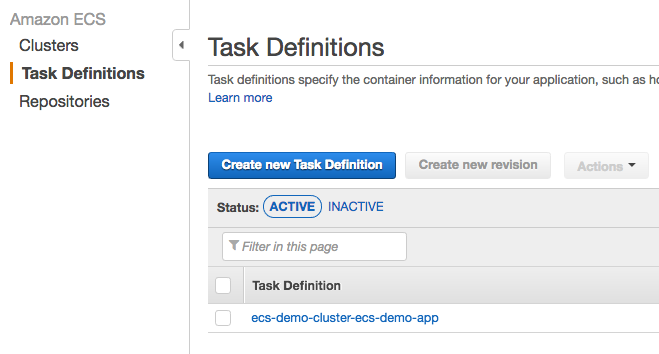
1. Creating the Task Definition:
To create a Task Definition, Click on the Task Definitions section of the ECS menu on the left side of the console, and then click the  button.
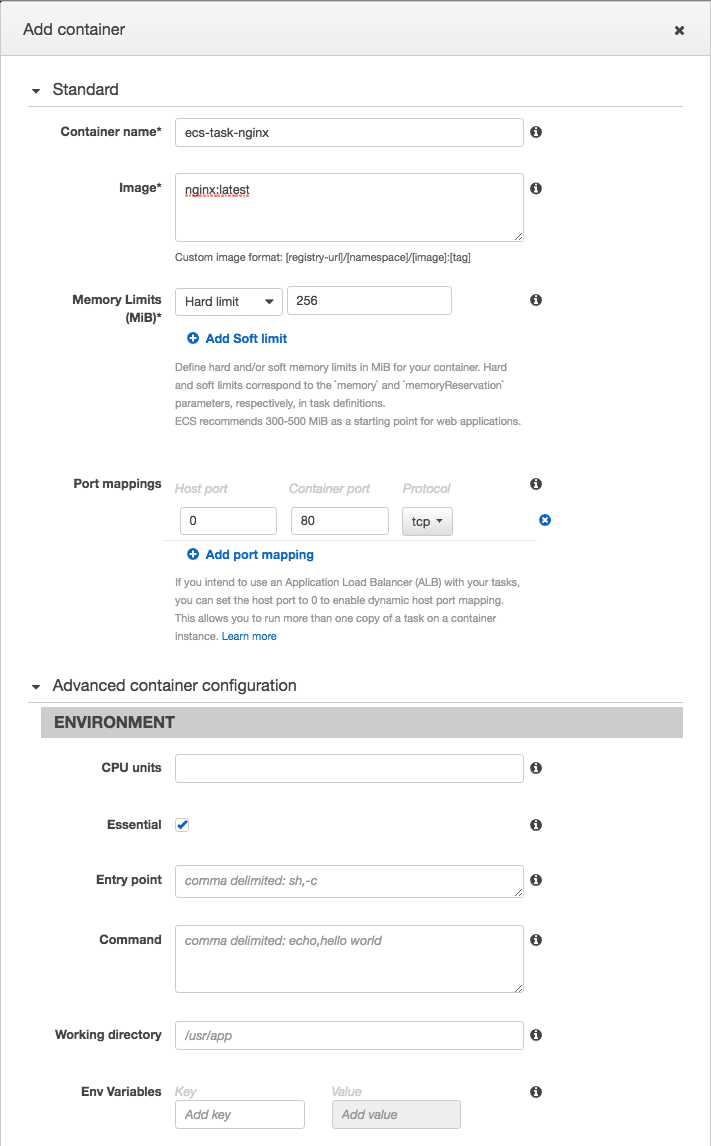
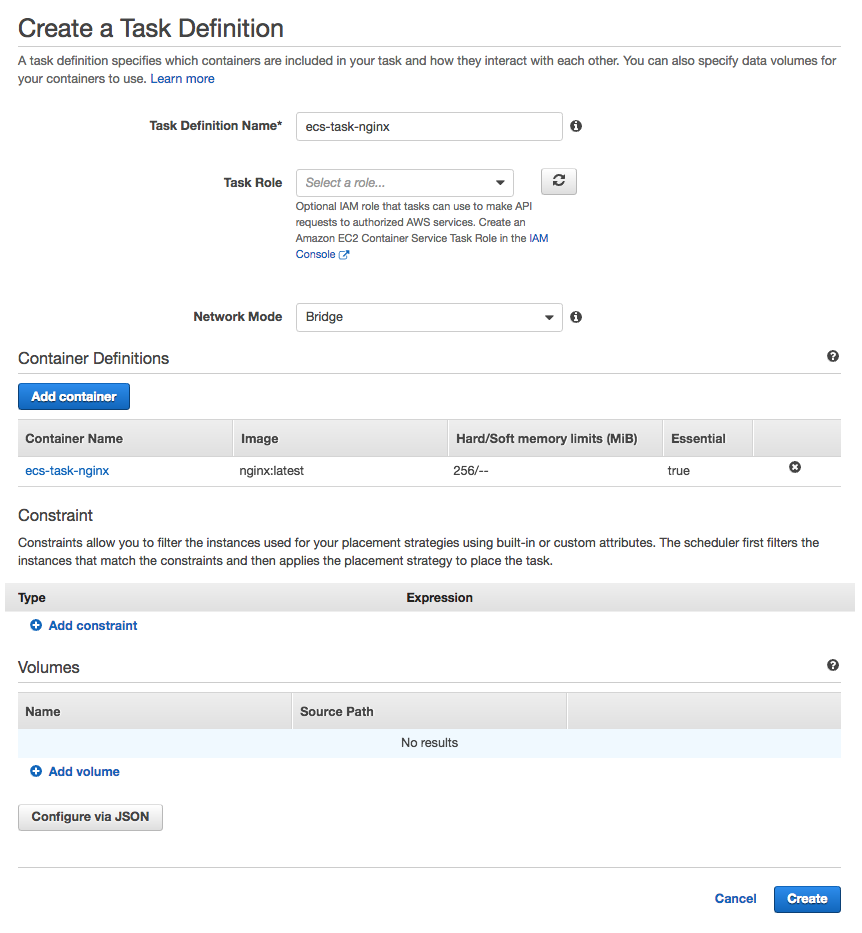
2. Task Parameters:
In the Create a Task Definition screen, type in ecs-task-nginx as the Task Definition name. Next Click on the  button. This will slide a window out that will allow you to fill in the details pertaining to the container or tasks runtime environment. In the Add Container dialog, under the Standard section, set the Container name to
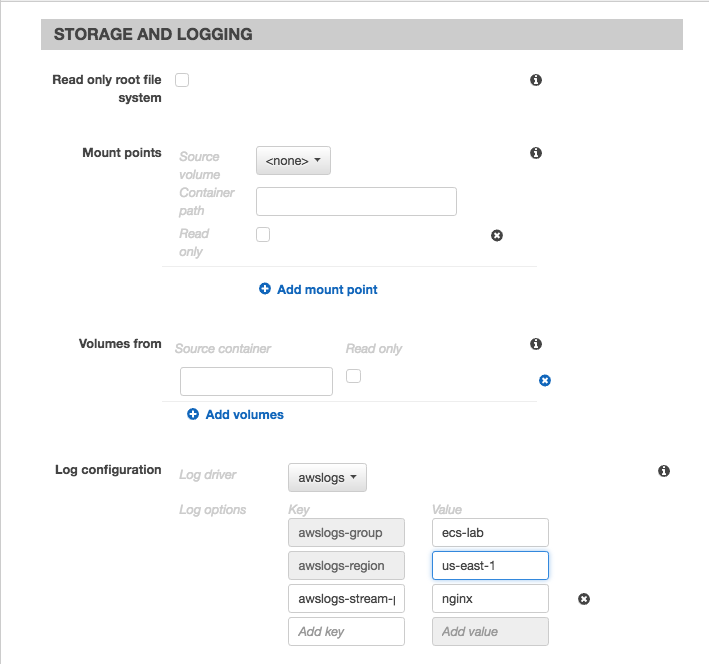
 ecs-task-nginx, set the Image to nginx:latest, set the Memory Limits (MiB) to 256, and lastly Port mapping should have the Host port set to 0, the Container port to 80, and the Protocol set to tcp. Next Navigate down to the Storage And Logging section, and under the Log configuration, choose awslogs as the log driver, and set the values of awslogs-group to ecs-lab, awslogs-region set to your region (us-east-1 in this lab), and the aws-streams-prefix set to nginx. Once done, click the  button.
3. Create and Verify:
Review the selections, and once satisfied, click on the button, to actually create the task definition.
* We've specified a specific container image, including the
:latest tag. Although it's not important for this lab, in a production environment where you were creating Task Definitions programmatically from
a CI/CD pipeline, Task Definitions could include a specific SHA hash, or a more accurate tag. * In this example, you will also notice that the image we are using is simply
nginx:latest, which appears to be missing the URL part of the image naming convention. If an image only shows the repository:tag designation, it simply implies that the image will be pulled from the docker hub, and is an official image which doesn't require the prefix name space. When the docker daemon sees a repository:tag designation it auto implies to pull the library/nginx:latest image directly from the [Docker Hub](https://hub.docker.com). * Under containerDefinitions.portMappings, we've specified a containerPort (80), but left hostPort as 0. This is required to facilitate dynamic port allocation. This means that we don't need to map the Container Port to a specific Host Port in our Container Definition; instead, we can let the ALB allocate a port during task placement. To learn more about port allocation, check out the ECS documentation at http://docs.aws.amazon.com/AmazonECS/latest/APIReference/API_PortMapping.html.
Load Balancer:
Before we deploy our service, we will need to construct a load balancer listener for our new application deployment, as well as Target Group. A Target group will tell the load balancer how to handle incoming requests and where to send those requests on the backend. Things to account for will be existing listeners on a particular load balancer and the ports that they are using. Be mindful of ports already in use when setting up a new listener. Load Balancers and Load Balancer Target Groups can be found in the EC2 Dashboard. In order to get to the EC2 Dashboard, click the main Services menu, and select EC2 from the selection menu.
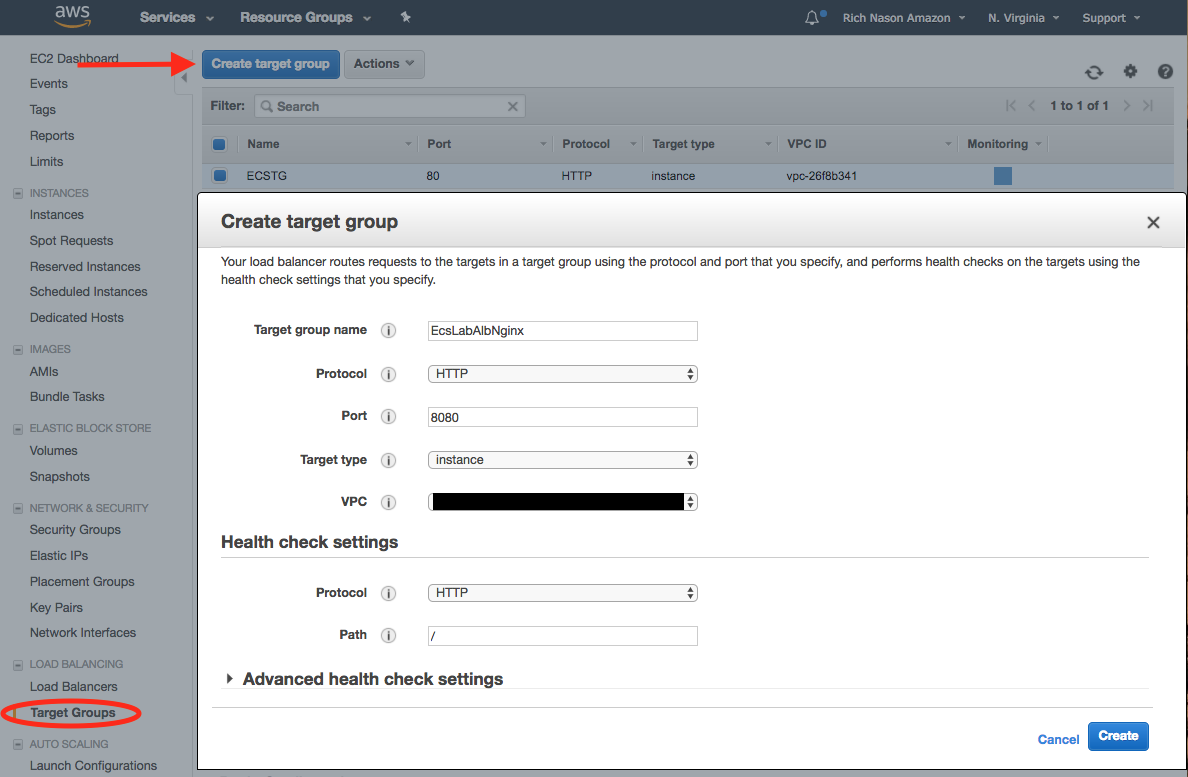
1. Create Target Group:
First, we need to create a Application Load Balancer (ALB) target group for the nginx service that we plan to deploy. Perform the following steps in order to provision a new Target Group (TG). In the EC2 menu on the left side of the console view, find and click on Target Groups. In the Target Groups window, click the  button to create a new target group. In the Create target group dialog box, set the Target group name to
 EcsLabAlbNginx, set the Protocol to HTTP, set the Port to 8080, Choose the appropriate VPC that the target group will reside in, and then under the Health check settings section, choose HTTP as the protocol, and / as the Path. Once complete, click the button to create the Target group.
2. Create LB Listener:
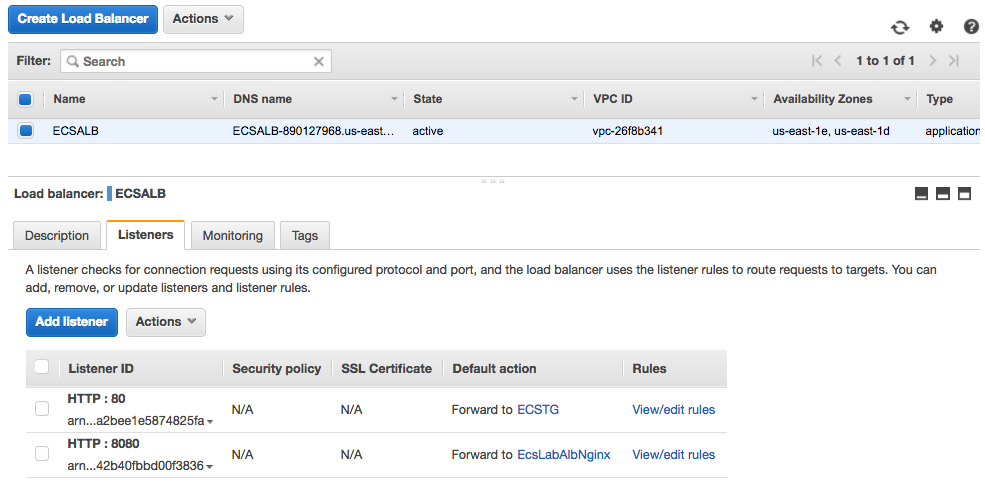
Now that we have defined our Target Group, we need to provision a new listener on the ALB. The new listener will listen on port 8080, and map traffic coming in from that port to the Target Group that we defined. Under the EC2 Dashboard view, in the left hand menu, click on Load Balancers, then select the ECSALB load balancer from the Load Balancers view, and in the LB details pane, click on Listeners. Click the  button to add a new listener. In the Create Listener dialog box, Set the Protocol to
 HTTP, the Port to 8080, and then choose EcsLabAlbNginx as the Default target group. Last click on the button to create the new Listener.
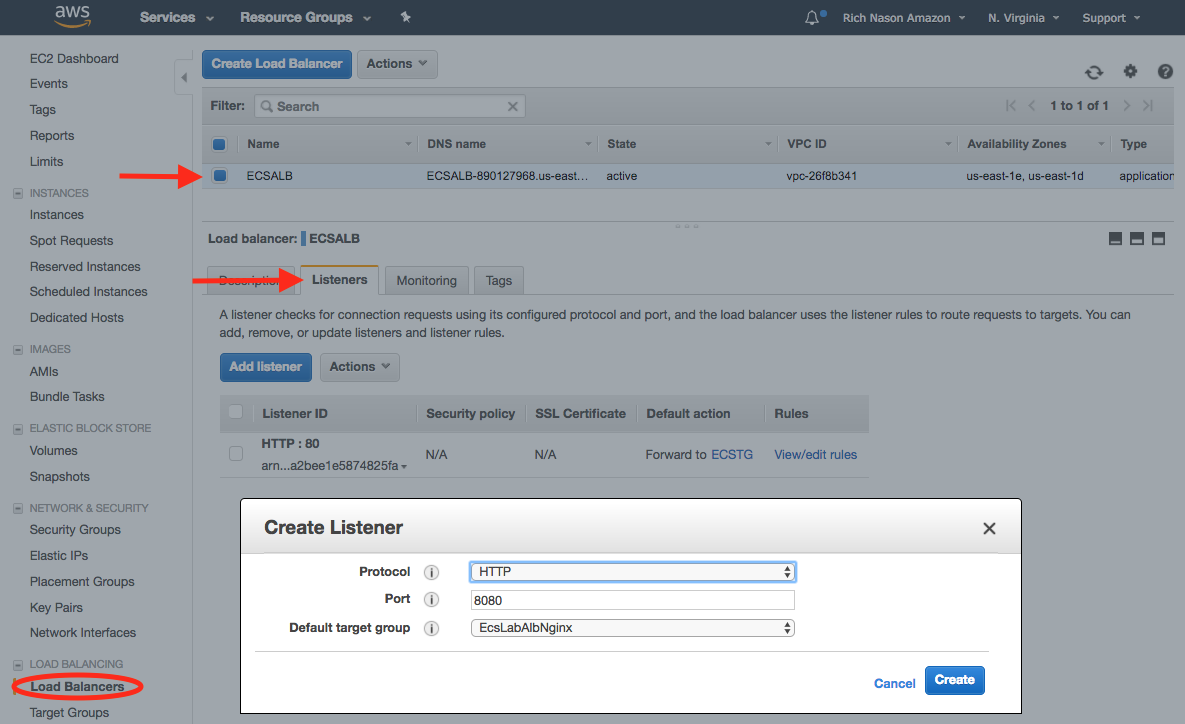
2. Verify Listener:
Last we need to verify that the listener is all set up. In order to do this, Go back to the main Load Balancer view, click on ECSALB, and in the details pane on the bottom, click on Listeners. You should now be able to see the original port 80 listener, as well as the new listener that we just configured.
Services:
Now We're going to create a service based on the Task Definition we created earlier. A service is simply just a group of tasks (containers) which when put together comprise a single service also know as a micro service. You can define how many tasks you want to run simultaneously, specify load balancing, auto scaling and configure many other options. To create a service we must first navigate to the ECS Console. From the main Services menu, select EC2 Container Service to go to the ECS console page.
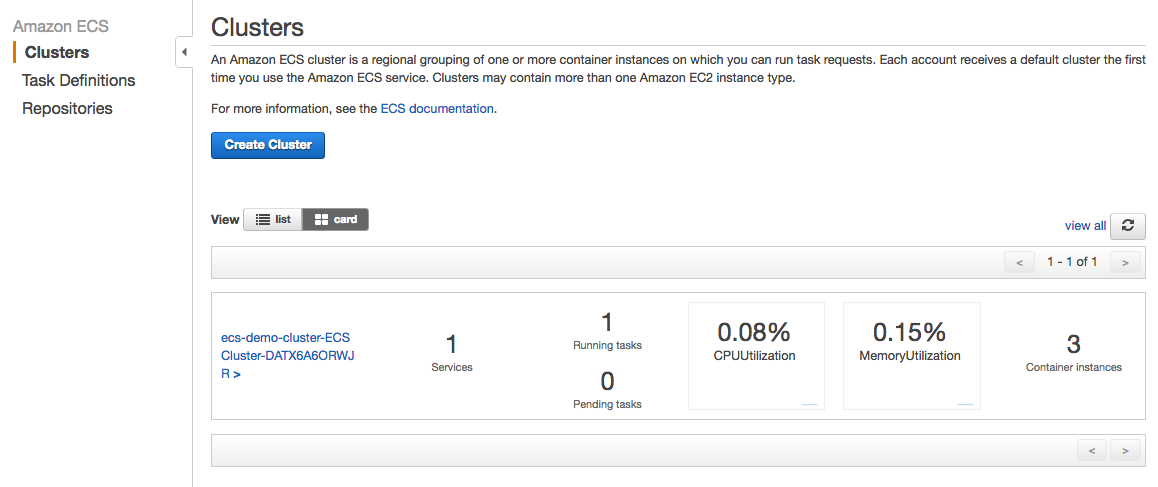
1. Create Service:
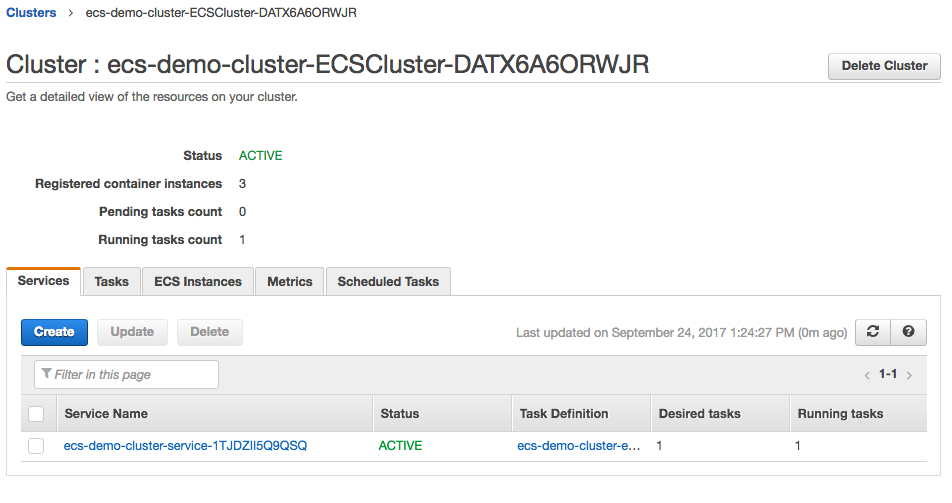
To create a Service, Go to the ECS Console, and from the main console page, click the cluster name link on the cluster where you want to deploy the service. The service that we will deploy will be based off of the Task Definition that we created in an earlier step.
Next in the cluster details page, click the button in the Services Tab.
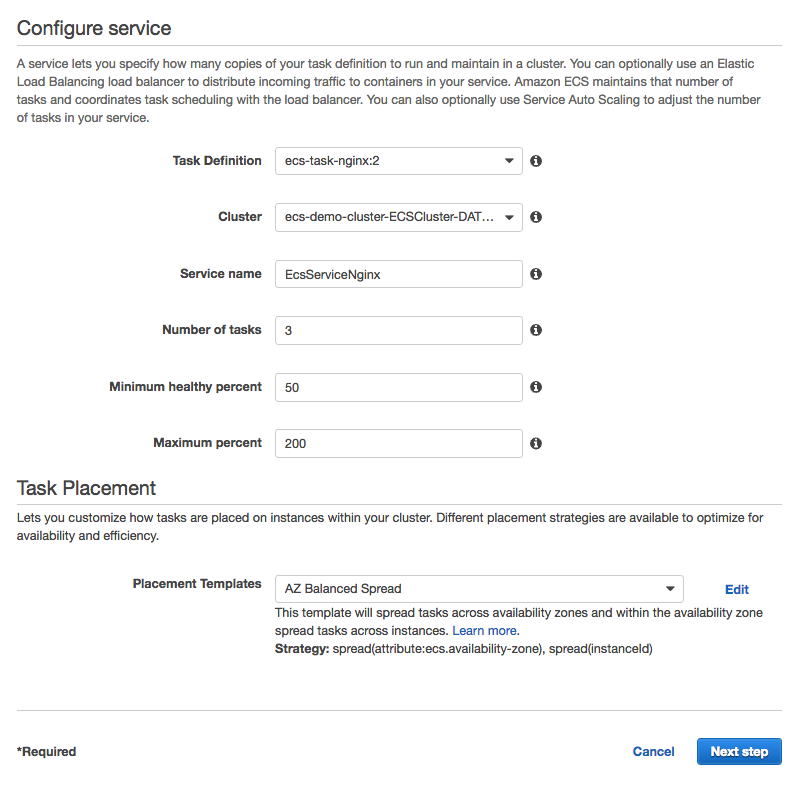
1. Service Details:
In the create service dialog pane, Choose ecs-task-nginx:1 as as the Task Definition to use, choose the correct cluster to deploy the service to, then type EcsServiceNginx in the Service name field, also set Number of tasks to 3, leave minimum healthy percent set to 50, and Maximum percent at 200, last, ensure that Placement Templates is set to AZ Balanced Spread. Finally click the  button.
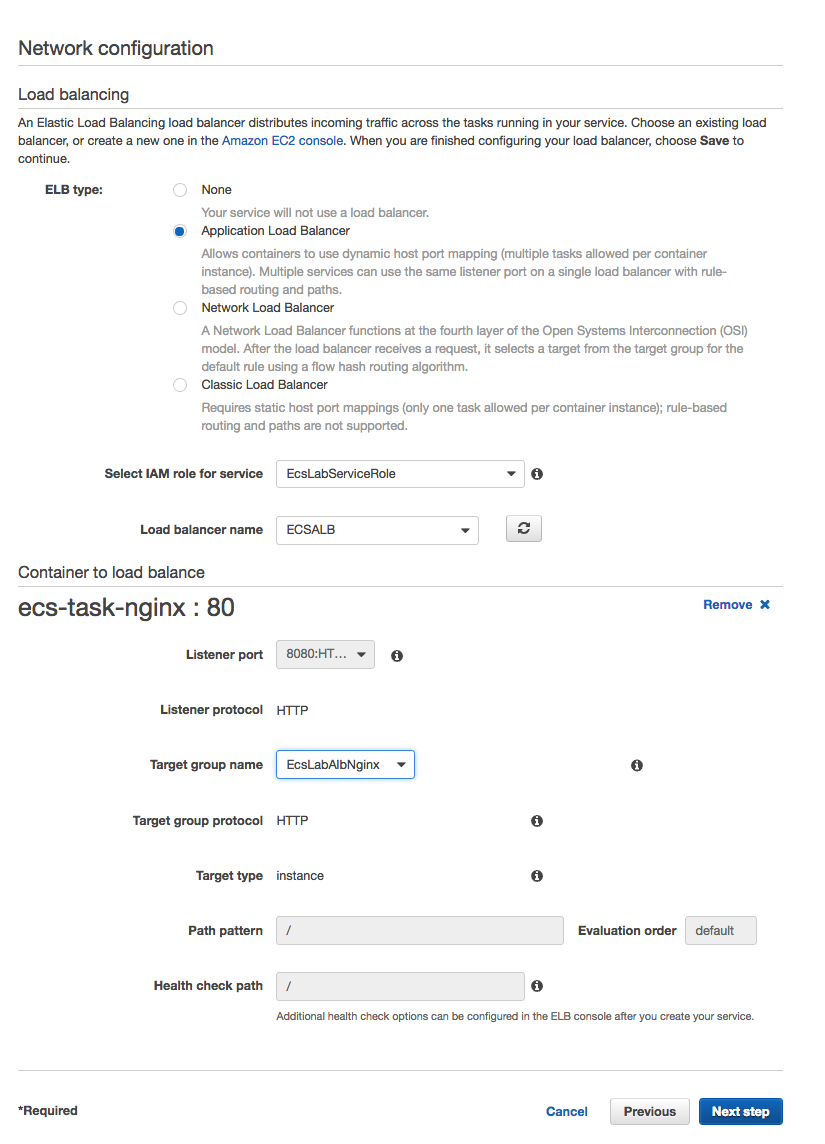
Next, In the Network Configuration screen, Choose Application Load Balancer as the ELB type, then choose EcsLabServiceRole in the Select IAM role for service field, and ECSALB in the Load balancer name field. Finally, in the Select a Container field, choose the ecs-task-nginx:0:80 container definition and click the  button.

In the ecs-task-nginx : 80 details section that appears, choose 8080:HTTP in the Listener port field, then select EcsLabAlbNginx from the drop list in the Target group name field. Once selected, click the button.
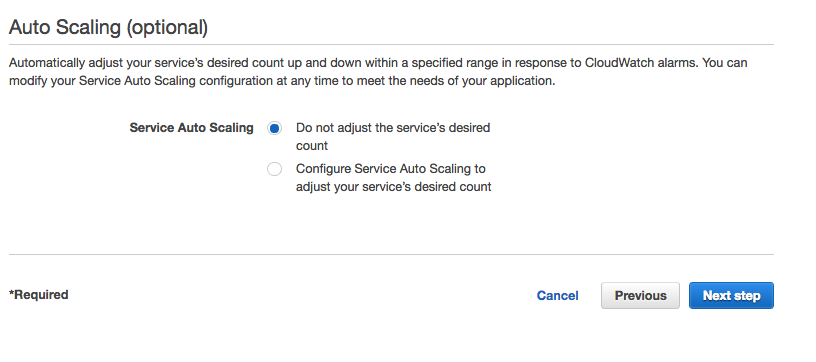
Next in the Auto Scaling (optional) view, ensure that Do not adjust the service's desired count is selected, and click the button.
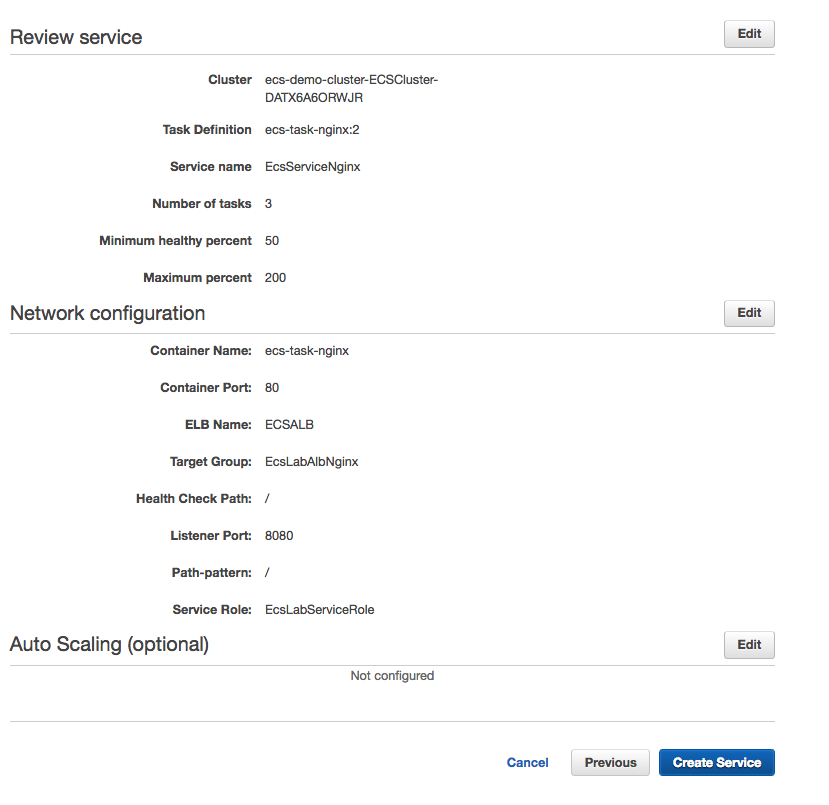
Last, Review the selection and once satisfied, click the  button.
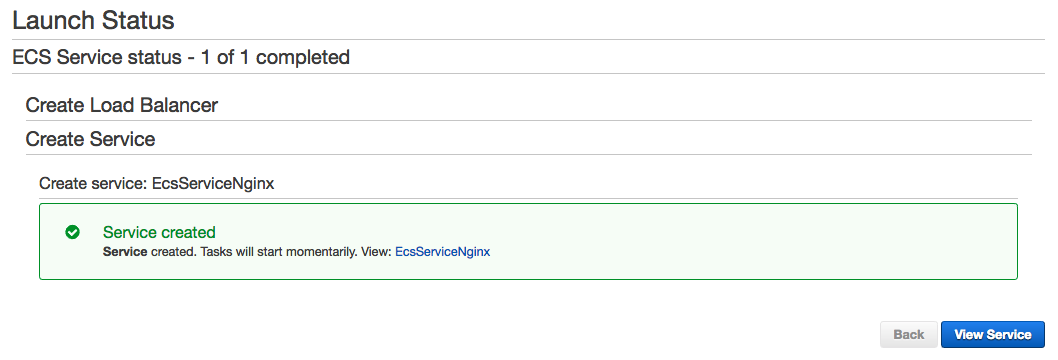
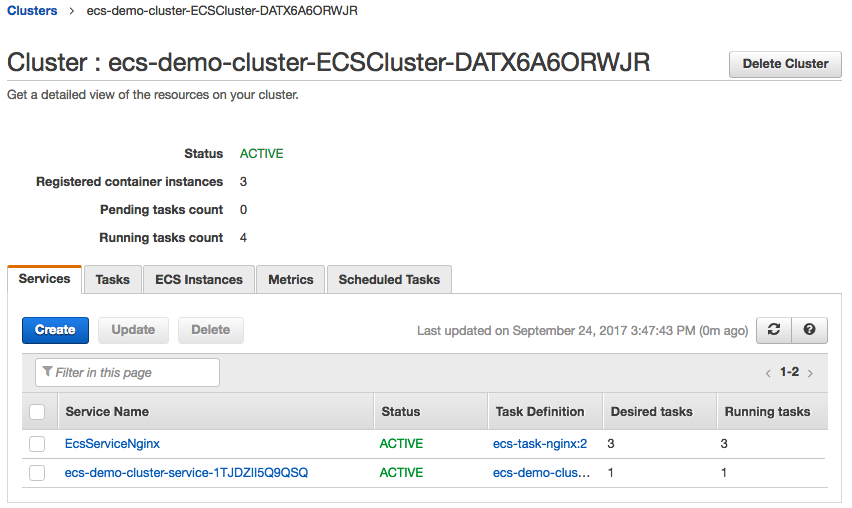
2. Verify the Service State:
Once the service has been created, we want to verify that the service task (containers) come on line and are in a running state. To do this go back to the services view by navigating back to the ECS console view, and again clicking on the cluster of which the service was deployed. Now we should see a total of 2 services running, and looking at the EcsServiceNginx service, the Desired Count should be set to 3, and the Running tasks should also be 3. If the Running Count has any other value, or is set to 0, this means that the tasks (containers) are not in a running state. Review earlier steps to troubleshoot, or click on the service itself, then go to the Tasks tab, and click Stopped in order to find the task, and examine why the task entered a stopped state.
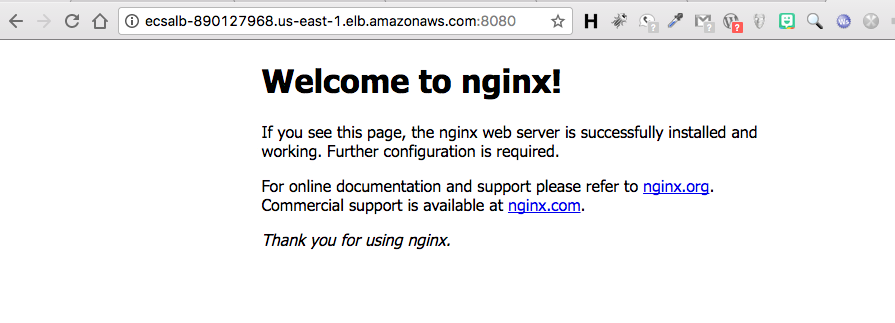
3. Verify the Service Launch:
Last we need to verify that our service launched and is running. We can do this by getting the LB DNS address and pasting it into a browser window. The expected result should be seeing the nginx start page. In order to get the Load Balancer Address, click the main Services menu, and select EC2 from the selection menu.
In the EC2 Dashboard menu, on the left, Click Load Balancers, choose the ECSALB Load Balancer, and in the LB Details panel, under the Description section, look for the DNS name:.
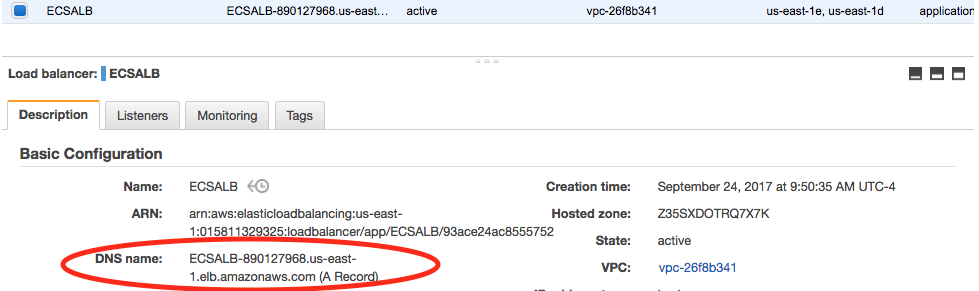
Copy the DNS Name URL and paste it into a browser, adding the listener port of :8080. The Nginx start page should load in your browser window.
Resources:
Lab Pre-Requisite Packer File:
Packer File:
{
  "builders": [{
    "type": "amazon-ebs",
    "access_key": "{{user `aws_access_key`}}",
    "secret_key": "{{user `aws_secret_key`}}",
    "region": "{{user `region`}}",
    "source_ami": "{{user `ami`}}",
    "instance_type": "{{user `instance_type`}}",
    "ami_name": "{{user `ami_name`}}-{{timestamp}}",
    "ami_description": "{{user `ami_description`}}",
    "availability_zone": "{{user `availability_zone`}}",
    "vpc_id": "{{user `vpc_id`}}",
    "subnet_id": "{{user `subnet_id`}}",
    "security_group_id": "{{user `security_group_id`}}",
    "ssh_keypair_name": "{{user `ssh_keypair_name`}}",
    "ssh_agent_auth": true,
    "ssh_username": "{{user `ssh_username`}}",
    "associate_public_ip_address": true,
    "ssh_private_ip": false,
    "tags": {
        "Name": "{{user `tag_name`}}",
        "OS_Version": "{{user `tag_osver`}}"
    }
  }],

  "provisioners": [
    {
      "type": "shell",
      "inline": [
        "sudo yum clean all",
        "sudo yum -y update",
        "sudo yum install -y docker jq",
        "sudo chkconfig docker on",
        "sudo /etc/init.d/docker start",
        "sudo pip install awscli",
        "sudo curl -LO https://storage.googleapis.com/kubernetes-release/release/$(curl -s https://storage.googleapis.com/kubernetes-release/release/stable.txt)/bin/linux/amd64/kubectl",
        "sudo mv kubectl /usr/bin/",
        "sudo chmod +x /usr/bin/kubectl",
        "sudo curl -L https://github.com/docker/compose/releases/download/1.16.1/docker-compose-`uname -s`-`uname -m` -o /usr/local/bin/docker-compose",
        "sudo chmod +x /usr/local/bin/docker-compose"
      ]
    }
]}
Packer Build-Vars File:
{
    "aws_access_key": "ABCDEFGHIJKLMNOPQRST",
    "aws_secret_key": "abcdefghijklmnopqrstuvwxyz1234567890abcd",
    "instance_type": "t2.small",
    "region": "us-east-2",
    "availability_zone": "us-east-2a",
    "ami": "ami-ea87a78f",
    "vpc_id": "vpc-y12345ba",
    "subnet_id": "subnet-12a3456b",
    "security_group_id": "sg-a6ca00cd",
    "ssh_keypair_name": "MyKey",
    "ssh_username": "ec2-user",
    "ami_name": "Container-Lab",
    "ami_description": "Image with all of the tools required to run ECS/K8 Labs",
    "tag_name": "Container-Lab",
    "tag_osver": "Amazon Linux"
}
Packer Build Command:
packer build -var-file=buildvars.json container_lab.json